

Creating Custom Lanterns by Recycling Your Old Tin Cans

Here’s what you’ll need:
- Tin cans (varying sizes)
- Marker
- Drill and bits (meant for stainless or heavy steel) OR Hammer and a nail
- Wire
- Glossy spray paint
- Candles

Step One: Create Your Design
One of the great things about this project is that it doesn’t have to be perfect. It’s all about casting interesting light and shadows when everything is finished. Pull from constellations, abstract shapes, swirls, or even other lanterns for your inspiration. I chose to hit the Internet for some ideas on basic shapes and motifs.
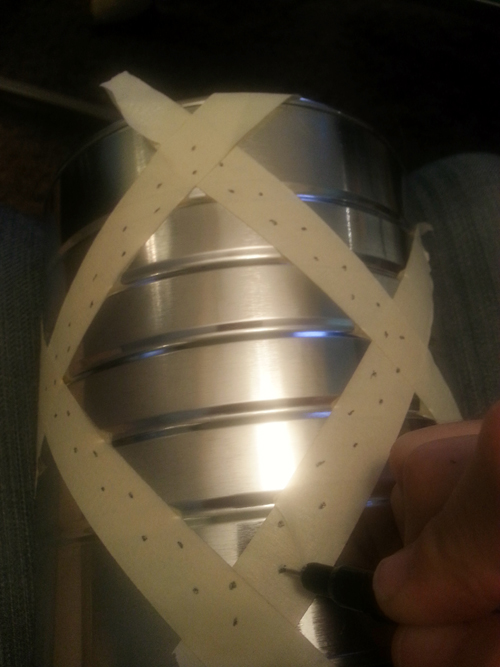
Step Two: Transfer the Design
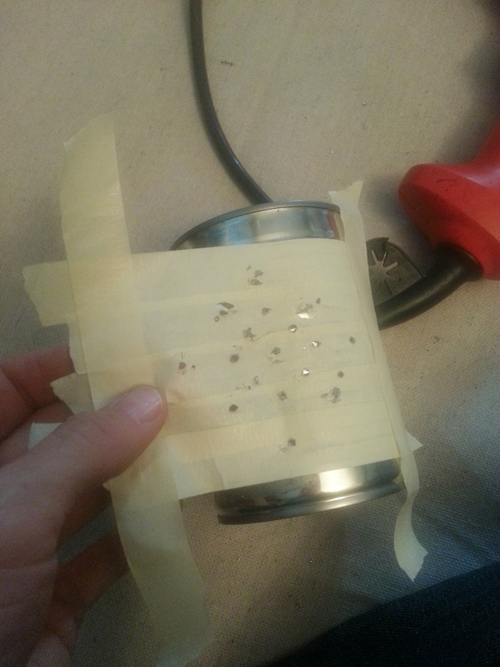
Once you have picked out your design, it’s time to transfer the pattern to your can. Using your marker, mark out your configuration for easy drilling later. If you’re concerned about being a little more precise, transfer the pattern to masking tape. I personally like to use tape because it allows me to see the pattern a little better.
Step Three: Drill it Out
The pattern has been decided and is now in place. It’s time to start drilling. Using a drill bit that’s specifically for drilling into metal, puncture your can where you’ve marked out your holes. Repeat this process until your entire pattern is drilled out. If you’re uncomfortable using a drill for this part, feel free to use a hammer and nail instead. Quick Tip: If you’re using tape to show your pattern, just move it around your can to keep the consistency.

Step Four: Attach the Handle
At the top of your can, add two more puncture holes across from each other for your handle. Make sure to make the holes large enough to fit the wire through. Once the holes are in place, thread the wire through on one side and twist off. Stretch the wire across to the other side (leaving enough to form a handle) and tie off.

Step Five: Time to Decorate
You can absolutely leave your can as is, but why not take it to that next step and add a bit of color for a more custom look? Coordinate your cans with the rest of your accessories or use a bold color to make a bigger statement.
Spray your cans using slow and even passes with your spray can. When you’ve finished adding your color, move your cans to the side to dry. DON’T try and illuminate your lanterns without letting them properly dry first. We’re making lanterns, not Roman Candles!

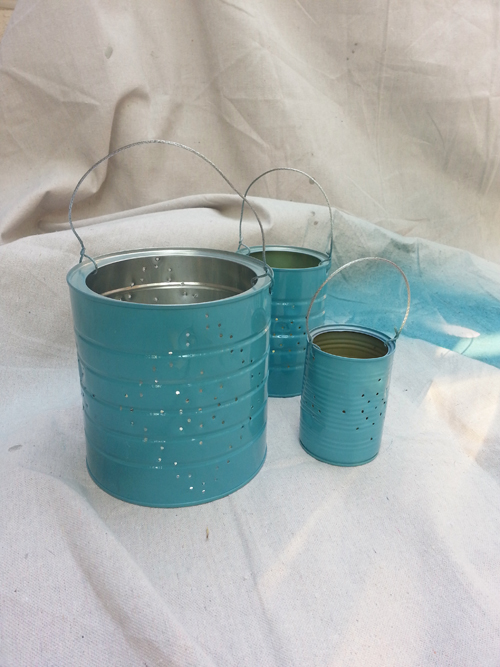
Once your cans are dry, all that’s left to do is insert your candles and watch them glow!


More about Summer Baltzer
Known for her role on HGTV’s “Design on a Dime” and “Unhinged” for TLC, Summer Baltzer has established herself as a woman not afraid to pick up a tool, paintbrush or sewing needle to create innovative and one-of-a-kind projects, inspiring women and men everywhere to grab hold of the reins and take chances with their own personal style. And now, as one of television’s few female general contractors, she is taking empowerment to a whole new level! Summer’s philosophy is that all design rules are meant to be broken. Good design is about finding your own personal style and making it work to your advantage. Her main goal has always been to empower people everywhere to create designer- inspired looks in their own homes. On television, Summer specializes in creating distinctive, high-end interiors on strict budgets. She also loves helping people work with what they have, then teaches them how to add, revamp and revitalize to create stylish, low-cost and unique interiors that reflect the personality of the client. Summer’s clients not only have the benefit of her overall vision of a project, but they also get the hands-on skills and expertise to “pitch in” and get the job done. This personalized touch puts the final stamp on a project that makes a house a home.
