How to Build a Work Bench on a Budget

 In Ideas and How To's

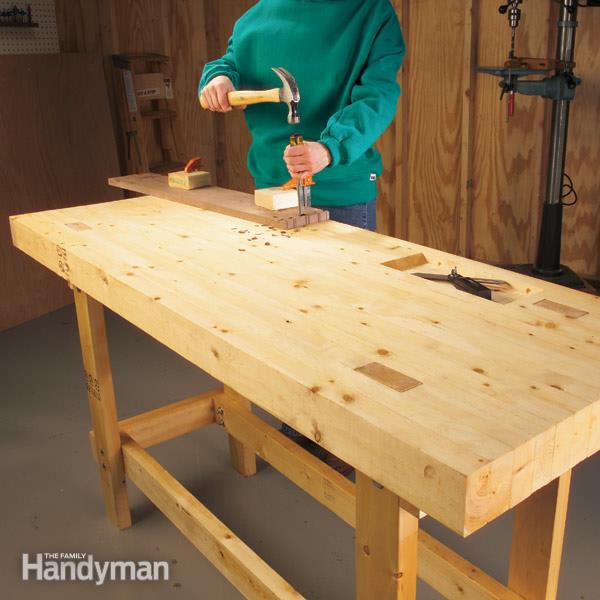
Build a simple, strong workbench made entirely from 2x4s. It’s inexpensive (less than $100) and takes only about four hours to build.

By the DIY experts of The Family Handyman Magazine

Step 1: Build the base first

Here’s a worktable that takes only an afternoon to build and can absorb a real pounding. It’s as rugged as a spendy European-style woodworker’s bench, but it’s made entirely from 2x4s. To build it, you’ll need:

  • Four 33-in. 2x4s (legs A)
  • Four 46-in. 2x4s (long stretchers B)
  • Four 16-1/2 in. 2x4s (end stretchers C)
  • Fifteen 5-ft. 2x4s (bench top D)
  • Sixteen 3-1/2 in. x 3/8-in. carriage bolts, nuts and washers Sixteen 3-in. x 3/8-in. lag screws
  • 2 lbs. of 3-in. deck screws

Build the base first
Clamp together the stretchers and legs, then predrill and bolt the base together. Keep the width of the legs from outer edge to outer edge at exactly 16-1/2 in. Use this base as a large sawhorse to assemble the top.

Finished Workbench and Construction Details

Use the parts list in Step 1 and this photo to organize and assemble the workbench parts.

Finished workbench

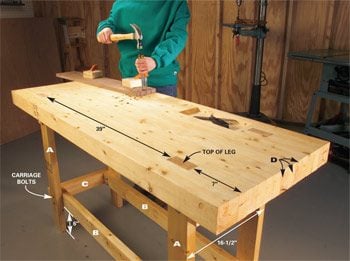
Workbench and details

Step 2: Assemble the top

Cut 15 top boards 5 ft. long and rip them to 3 in. wide with a table saw so the top will glue up flat without the typical rounded edges of 2x4s. For the leg slot, cut two of the top boards into three pieces: a 39-in. middle piece and two 7-in. end pieces. 
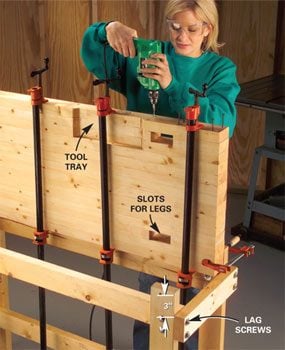
Glue and screw the top together, one board at a time, with 3-in. deck screws, keeping the ripped edge facing up and level with the adjoining boards. Use a corded drill so there’s plenty of oomph to drive each screw below the surface. Note that the third glue-up from each end is where each leg notch is inserted. You can also create a nifty tool tray in the top by notching the three top pieces with a jigsaw. Clamp every 8 in. or so before driving in the 3-in.deck screws. Predrill the screw holes near the ends to prevent splitting. When you’re screwing on the 7-in. long 2 x 4s to create the leg slots, use a scrap piece of 2×4 as a spacer.

Step 3: Final assembly

Before joining the top to the base, loosen the bolts and screws on the lower stretchers to create a little play in the leg posts. Align the top notches with the leg posts and tap the top into place with a hammer and piece of scrap wood, working evenly around the table until all leg posts are level with the tabletop. Tighten the lower stretchers and you’re done. A hefty thanks to Doug Merrill for this weighty idea.

Required Tools for this Project

Have the necessary tools for this DIY project lined up before you start—you’ll save time and frustration.

  • Hammer
  • Clamps
  • Tape measure
  • Circular saw
  • Adjustable wrench
  • Corded drill
  • Glue
  • Jigsaw
  • Table saw

Required Materials for this Project

Avoid last-minute shopping trips by having all your materials ready ahead of time. Here’s a list.

  • 2x4s
  • Carriage bolts, 3-1/2-in. x 3/8-in. with nuts and washers
  • Lag screws, 3-in. x 3/8-in. with washers
  • Deck screws, 3-in.
Recent Posts
Contact Us

Fill out this form to get in touch with us!

Not readable? Change text.